Вы когда-нибудь замечали, как текстура продукта может мгновенно привлечь ваше внимание?? Будь то шелковистая гладкость увлажняющего крема или мерцание теней для век., Текстура играет огромную роль в том, как вы воспринимаете косметические продукты.. Речь идет не только о внешнем виде, но и о создании сенсорной связи.. Когда вы выделяете текстуры на фотографиях бьюти-брендов, вы показываете клиентам, чего именно ожидать. Это укрепляет доверие и делает ваш продукт реальным., почти осязаемый, даже через экран. После всего, отличная фотография не просто показывает — она рассказывает историю.
Вы знали? Исследования показывают, что такие особенности текстуры, как изменение интенсивности и яркость, являются ключевыми факторами оценки красоты.. Они объясняют почти 59% апелляции, доказывая, насколько важна текстура для создания потрясающих визуальных эффектов.
Важность фотографии косметических товаров
Почему текстура является ключом к повествованию о продукте
Когда дело доходит до фотографии косметических товаров, текстура – это не просто деталь, это история. Подумайте о сливочном вихре маски для лица или глянцевом блеске помады.. Эти текстуры сообщают покупателям, как ощущается ваш продукт., как это работает, и зачем им это нужно. Например, люксовые бренды часто используют тисненая текстура на упаковке передать изысканность и качество. Этот тактильный дизайн не только повышает визуальную привлекательность, но и создает незабываемые впечатления от брендинга.. Демонстрируя текстуры, вы даете своей аудитории сенсорный предварительный просмотр, сделать ваш продукт более привлекательным и желанным.
Кончик: Используйте снимки крупным планом, чтобы подчеркнуть сложные детали, например мерцание., гладкость, или зерно. Эти изображения могут сделать ваш продукт почти осязаемым., даже онлайн.
Укрепление доверия благодаря аутентичному представлению текстур
Подлинность – это все в фотографии косметической продукции. Клиенты хотят видеть реальную сделку, не слишком отредактированная версия вашего продукта. Честные бренды часто используют фотографии «до» и «после», чтобы показать подлинный эффект своей косметики.. Такой подход укрепляет доверие и убеждает покупателей в том, что ваши претензии заслуживают доверия.. Вы знали, что 93% женщин уделяют пристальное внимание заявлениям об эффективности прежде чем совершить покупку? Показ истинной текстуры вашего продукта — будь то легкая сыворотка или насыщенное масло для тела — может иметь решающее значение..
Съемки в движении — еще один отличный способ завоевать доверие.. Например, снимок тонального крема или капли крема в действии показывает, как продукт наносится и ощущается. Эти визуальные эффекты не только обучают, но и вселяют доверие к вашему бренду..
Повышение узнаваемости бренда с помощью последовательных фотографий
Последовательность в фотографии косметических брендов — один из ключевых элементов фотографии косметических товаров.. Это то, что объединяет ваши визуальные эффекты и делает ваш бренд мгновенно узнаваемым.. Высокое качество, последовательные изображения могут улучшить имидж вашего бренда и даже повысить уровень вовлеченности в социальных сетях.. Исследования с помощью отслеживания движений глаз показывают, что привлекательные изображения привлекают внимание потребителей., в то время как тесты коэффициента конверсии показывают, что снимки образа жизни часто приводят к большему объему продаж, чем простые изображения продуктов..
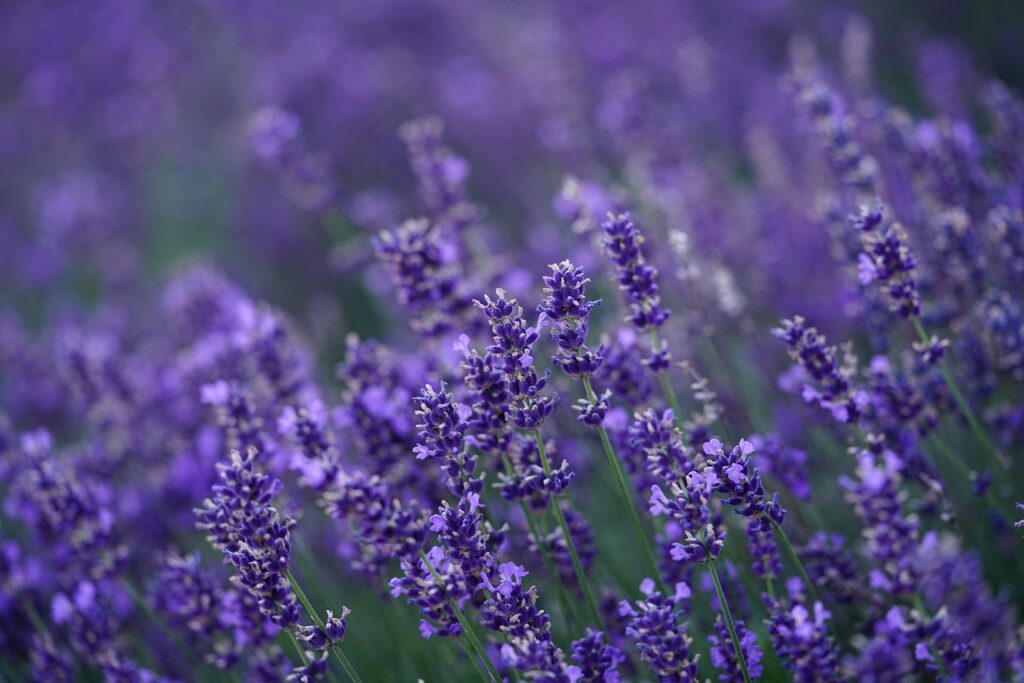
Чтобы сохранить последовательность, придерживайтесь единой цветовой палитры и стиля освещения. Например, если ваш бренд ориентирован на натуральные ингредиенты, мягкий, рассеянное освещение и землистые цвета могут усилить это послание.. Последовательные фотографии не только усиливают индивидуальность вашего бренда, но и гарантируют, что ваша продукция будет выделяться на переполненном рынке..
Подготовка к текстурной фотографии
Чистка и подготовка изделий для безупречного вида
Прежде чем вы даже подумаете о том, чтобы сфотографироваться, убедитесь, что ваши продукты готовы к съемке с помощью камеры. Чистый, Полированный продукт не только выглядит профессионально, но и гарантирует, что текстуры будут красиво выделяться на ваших снимках.. Начать с собираем все необходимое: а ткань из микрофибры, нежное чистящее средство, и белые перчатки чтобы избежать пятен. Для тканевого реквизита, инструменты, такие как валик для ворса, железо, или ручной отпариватель может творить чудеса.
Вот краткий контрольный список, который поможет подготовить ваши продукты к фото.:
Протрите поверхности, чтобы удалить пыль и отпечатки пальцев..
Используйте валик для ворса для тканевого реквизита или фона..
Отпаривайте или проглаживайте любые элементы ткани, чтобы они не мнулись..
Как только ваши продукты будут готовы, настройте свое оборудование. Зеркальная или беззеркальная камера., штатив, и хорошее освещение – обязательные условия для фотосъемки косметических товаров.. Эта подготовка гарантирует, что ваши текстуры сияют, не отвлекаясь..
Для чаевого: Всегда проверяйте свой продукт при правильном освещении перед съемкой.. Это поможет вам обнаружить любые недостатки, которые могут проявиться на конечном изображении..
Выбор реквизита, дополняющего текстуру продукта
Реквизит может улучшить или разрушить вашу композицию. Правильные варианты улучшат текстуру вашего продукта и расскажут связную историю.. Например, сочетание роскошного крема для лица с золотыми акцентами или мраморными поверхностями может повысить его премиальную привлекательность.. С другой стороны, Натуральный реквизит, такой как деревянные подносы или переработанная бумага, может подчеркнуть экологически чистые продукты по уходу за кожей..
Вот как разные реквизиты влияют на восприятие текстур:
Тип опоры | Влияние на текстуру продукта |
|---|---|
Роскошный реквизит | Сообщает о премиальном позиционировании продукта, повышение привлекательности для состоятельных потребителей. |
Натуральный и переработанный реквизит | Делает изображения аутентичными и понятными экологически сознательной аудитории.. |
Минималистичный и геометрический реквизит | Подчеркивает элегантный дизайн продукта, сделать его центром внимания на фотографиях. |
При постановке своего кадра, держите реквизит простым. Они должны дополнять, не одолеть, продукт.
Создание списка кадров для планирования композиций, ориентированных на текстуры.
Список кадров – это ваш путь к успешной съемке.. Это помогает вам оставаться организованным и гарантирует, что вы уловите каждую деталь текстуры вашего продукта.. Начните с перечисления ключевых текстур, которые вы хотите выделить.. Например, если вы фотографируете продукт по уходу за кожей, вы можете сосредоточиться на его кремовой консистенции, глянцевая отделка, или плавное применение.
Следующий, планируйте ракурсы и композиции. Снимки крупным планом хорошо подходят для сложных деталей., в то время как плоские макеты могут демонстрировать несколько текстур в одном кадре. Не забудьте включить кадры боевых действий, как мазок лосьона или образец помады, чтобы добавить динамический элемент в ваши визуальные эффекты.
Кончик: Группируйте похожие снимки вместе, чтобы сэкономить время во время съемки.. Например, сначала снимай все крупные планы, затем переходим к композициям образа жизни.
Подготавливая продукты, подбираем правильный реквизит, и планирование ваших композиций, вы создадите потрясающие визуальные эффекты, которые по-настоящему подчеркнут текстуру вашего продукта..
Техники освещения для фотографий бьюти-брендов
Боковое освещение, подчеркивающее глубину и размерность.
Боковое освещение меняет правила игры, когда дело доходит до фотографии косметических товаров. Направляя свет под углом 45 степени, вы можете создавать тени, подчеркивающие текстуру и глубину вашего продукта.. Этот метод творит чудеса с такими предметами, как тисненая упаковка или текстурированные кремы.. Тени и блики, которые он создает, придают вашим фотографиям трехмерное ощущение., сделать продукт более реалистичным.
Для достижения наилучших результатов, используйте жесткий источник света, как прожектор или голая лампочка, подчеркнуть сложные детали. Если вы хотите более мягкий вид, добавьте отражатель или заполняющий свет, чтобы сбалансировать тени. Это сохраняет текстуру заметной, не делая изображение слишком резким.. Например, боковое освещение может усилить мерцание теней для век или подчеркнуть гладкость флакона с сывороткой..
Для чаевого: Поэкспериментируйте с 4:1 соотношение от бликов к теням. Этот баланс увеличивает глубину, сохраняя при этом общее изображение визуально привлекательным..
Рассеянное освещение для мягкого, естественные текстуры с акцентом
Если вы стремитесь к более мягкому, более естественный вид, рассеянное освещение твой лучший друг. Этот метод равномерно распределяет свет по изделию., уменьшение резких теней и создание нежного свечения. Идеально подходит для демонстрации гладких или глянцевых текстур., как увлажняющая маска для лица или блестящий тюбик помады.
Чтобы добиться этого, используйте такие инструменты, как софтбоксы, диффузоры, или даже прозрачная занавеска на окне. Эти модификаторы рассеивают свет, сделать его менее интенсивным и более лестным. Например, размещение софтбокса над продуктом и немного позади него может подчеркнуть его текстуру, не перегружая изображение.. Рассеянное освещение также хорошо подходит для групповых снимков., обеспечение равномерного освещения каждого предмета и четкой видимости текстур.
Вы знали? Рассеянное освещение особенно эффективно для сложных поверхностей.. Он нормализует отражения под разными углами., выделение текстур, не выглядя при этом слишком резкими.
Стратегическое использование теней для добавления контраста
Тени — это не просто побочный продукт освещения — это инструмент, который можно использовать, чтобы добавить драматизма и контраста к вашим фотографиям.. Играя с тенями, вы можете сделать текстуры более выраженными и придать вашим изображениям ощущение глубины.. Например, тень, отбрасываемая баночкой с кремом, может подчеркнуть ее круглую форму и гладкую поверхность.
Для управления тенями, отрегулируйте угол и интенсивность источника света. Свет под низким углом может создавать длинные, драматические тени, в то время как более высокий угол дает более мягкое, более тонкие. Отражатели помогут смягчить тени, если они слишком резкие., в то время как черные карты могут углубить их для более яркого эффекта.
Быстрый совет: Используйте тени, чтобы направить взгляд зрителя на наиболее важные части вашего продукта.. Эта техника не только подчеркивает текстуру, но и добавляет нотки артистизма фотографиям вашего косметического бренда..
Освоив эти настройки освещения, вы можете раскрыть лучшее в текстурах вашего продукта. Используете ли вы боковое освещение для глубины, рассеянное освещение для мягкости, или тени для контраста, каждая техника добавляет уникальный элемент вашим фотографиям. Правильное освещение может преобразить вашу фотографию косметической продукции, придайте вашим продуктам неотразимый вид.
Настройки камеры и оборудование для текстурной фотографии
Лучшие настройки камеры для съемки сложных деталей
Правильные настройки камеры — первый шаг к демонстрации текстур вашего продукта.. Вы хотите каждое мерцание, мазать, и покружись, чтобы выделиться. Чтобы сделать это, сосредоточьтесь на трех ключевых параметрах: апертура, выдержка, и ИСО.
Диафрагма: Это контролирует, сколько света попадает в вашу камеру, и влияет на глубину резкости.. Для острого, подробные снимки, придерживайтесь диапазона диафрагмы от f/8 до f/11. Эти настройки позволяют держать ваш продукт в фокусе, сохраняя при этом четкость по всему кадру.. Если вы фотографируете один предмет, более широкая диафрагма, например f/2,8, может размыть фон и сделать продукт ярким..
Скорость затвора: Быстрая выдержка, например 1/125 с или выше, останавливает движение и обеспечивает четкие детали. Если вы работаете на более медленных скоростях, используйте штатив, чтобы избежать размытия.
Iso: Держите ISO на низком уровне — около 100 или 200 — для минимизации шума и сохранения качества изображения..
Для чаевого: Используйте ручной режим, чтобы иметь полный контроль над этими настройками.. Это позволяет вам точно настроить камеру для получения наилучших результатов при съемке косметических товаров..
Выбор объективов для макросъемки и съемки крупным планом
Выбранная вами линза может улучшить или разрушить вашу способность выделять детали вашего продукта.. Макрообъективы вы любите снимать сложные текстуры. Эти объективы предназначены для съемки крупным планом и обеспечивают 1:1 увеличение в натуральную величину, что делает их идеальными для фотографий косметических брендов.
Вот что нужно искать в объективе:
Макрообъективы: Фокусное расстояние от 90 до 105 мм обеспечивает удобное рабочее расстояние при съемке детализированных текстур..
Прайм-линзы: Эти линзы обеспечивают резкость и четкость изображения., идеально подходит для снимков с акцентом на текстуру.
Зум-объективы: Если вам нужна универсальность, зум-объективы позволяют регулировать фокусное расстояние, не меняя объективы.
Вы знали? Макролинзы особенно эффективны для продуктов со сложным дизайном., например, тисненая упаковка или мерцающие тени для век.
Основные инструменты, такие как отражатели и рассеиватели.
Осветительные инструменты, такие как отражатели и рассеиватели меняют правила игры в улучшении текстур продуктов. Отражатели отражают свет на ваш продукт, заполнение теней и добавление яркости. Рассеиватели смягчают резкий свет, создание равномерного свечения, которое подчеркивает текстуры, не перегружая изображение.
Инструмент | Функция |
|---|---|
Отражатели | Управлять светом, заполнить тени, и осветлить текстуры. |
Карты отказов | Нацельтесь на конкретные области для выделения. |
Диффузоры | Смягчите свет и равномерно распределите его по изделию.. |
Вам не нужно сложное оборудование, чтобы начать работу. Предметы повседневного использования, такие как прозрачные шторы., белые простыни, или калька может работать как диффузоры. Для отражателей, попробуйте алюминиевую фольгу или белый картон для плакатов..
Быстрый совет: Расположите рассеиватель между источником света и продуктом, чтобы свести к минимуму резкие тени и создать мягкий свет., естественный вид.
Овладев настройками камеры, выбор правильных линз, и используя необходимые инструменты, вы усовершенствуете свои фотографии косметических товаров. Эти методы гарантируют сияние текстур вашего продукта., делая их неотразимыми для вашей аудитории.
Креативные подходы к выделению текстуры продукта
Мазки, разливы, и образцы для динамических визуальных эффектов
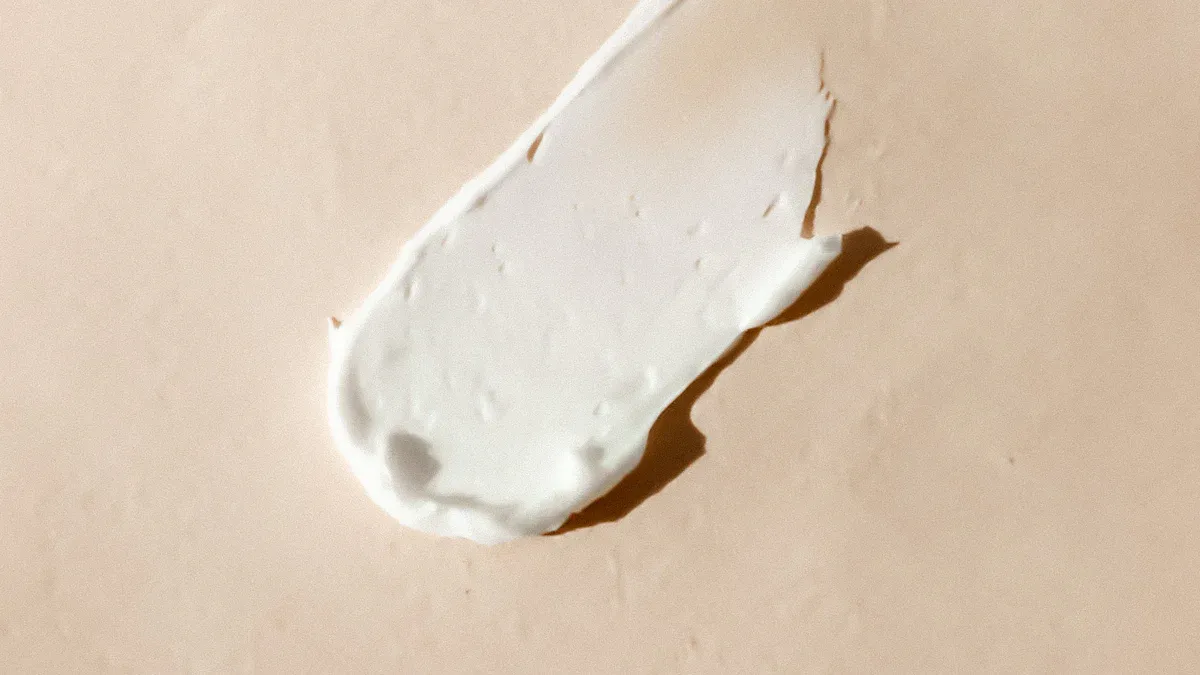
Мазки, разливы, и образцы — одни из наиболее эффективных способов продемонстрировать текстуру косметических продуктов.. Мазок продукта, как кремовый увлажняющий крем или глянцевая помада, мгновенно сообщает о своей последовательности и качестве. Эти визуальные эффекты не только подчеркивают текстуру продукта, но и добавляют динамики., художественный элемент вашей фотографии.
Например, мазок тонального крема на чистую поверхность может показать его плавное нанесение., а немного мерцающей пудры теней для век может подчеркнуть яркую пигментацию.. Индивидуальные косметические мазки также помогут вам создать уникальные композиции, соответствующие индивидуальности вашего бренда.. Соедините эти мазки с дополнительным реквизитом или фоном, чтобы повысить их визуальную привлекательность..
Кончик: Используйте мастихин или небольшой шпатель, чтобы создать чистый, намеренные клеветы. Это гарантирует, что текстура будет выглядеть безупречно и профессионально..
Снимки крупным планом, чтобы продемонстрировать сложные детали.
Снимки крупным планом необходимы для фотографии косметических товаров., особенно если вы хотите подчеркнуть сложные текстуры. Этот метод позволяет увеличить детали продукта., заставляя их казаться больше, чем в жизни. Будь то мелкое мерцание теней для век или бархатистая текстура крема для лица., крупные планы создают тактильный визуальный опыт для вашей аудитории.
Когда вы подчеркиваете текстуру и материал на своих фотографиях, вы помогаете клиентам чувствовать себя более уверенно при принятии решений о покупке. Они могут почти “чувствовать” продукт через экран, что значительно повышает его воспринимаемое качество. Макрофотография здесь творит чудеса., точно фиксируя каждую деталь.
Вы знали? Выделение текстуры на фотографиях продукта может повысить вовлеченность потребителей, делая продукт более осязаемым и реальным..
Наложение текстур для богатого, многомерный вид
Наложение текстур — это творческий способ добавить глубину и объемность фотографиям вашего косметического бренда.. Комбинируя разные текстуры — например, глянцевую сыворотку с матовым фоном или продукт плюс мазок на текстурированной поверхности — можно создавать визуально эффектные композиции.. Такой подход не только привлекает внимание к продукту, но и рассказывает историю о его особенностях и преимуществах..
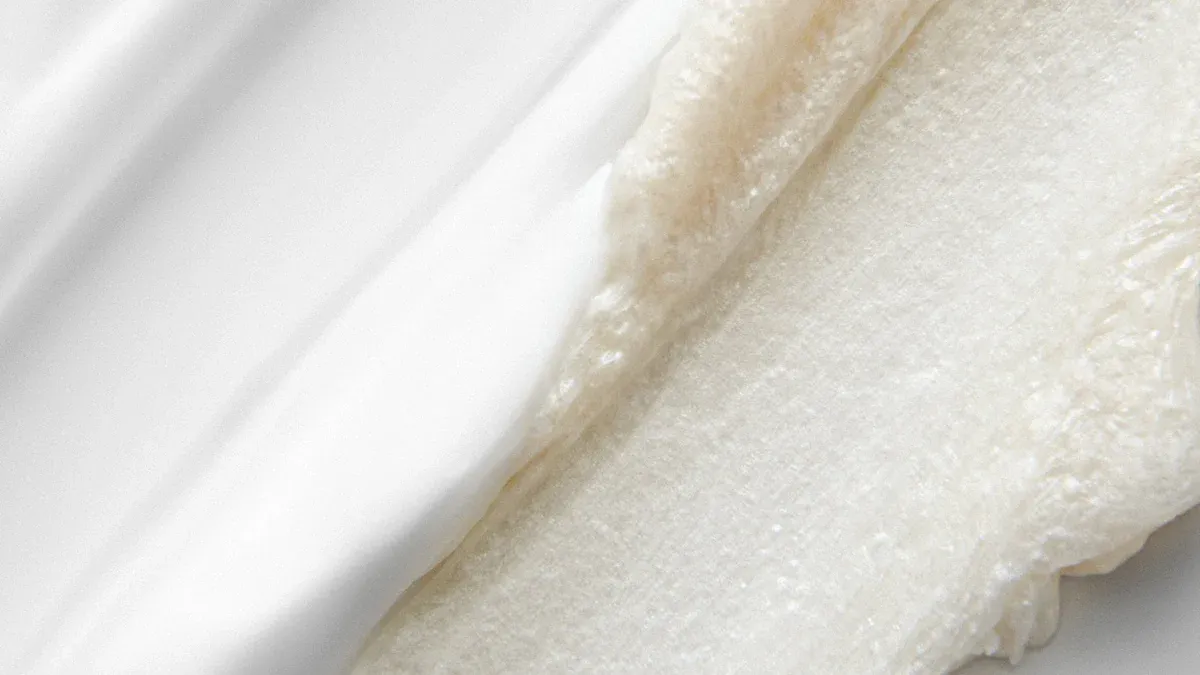
Например, сочетание кремового лосьона с мягкой тканевой подставкой может вызвать ощущение роскоши и комфорта.. С другой стороны, размещение изделия на черновой поверхности, натуральная поверхность, такая как дерево или камень, может подчеркнуть ее органические ингредиенты.. Экспериментируйте с различными комбинациями, чтобы найти идеальный баланс, который дополнит текстуру вашего продукта..
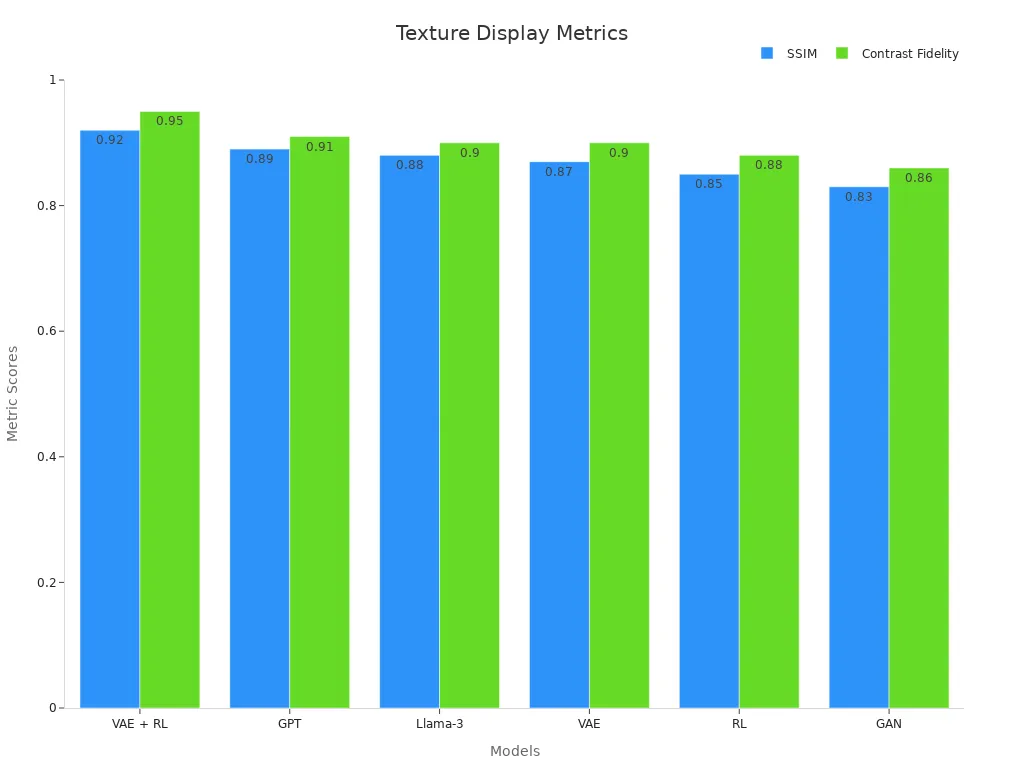
Вот краткое сравнение творческих методологий отображения текстур.:
Модель | SSIM | Контрастность | Точность текстуры | Цифровая точность цветопередачи |
|---|---|---|---|---|
НОГИ + РЛ | 0.92 | 0.95 | 0.94 | 0.93 |
GPT | 0.89 | 0.91 | N/a | N/a |
Лама-3 | 0.88 | 0.90 | N/a | N/a |
НОГИ | 0.87 | 0.90 | 0.88 | 0.85 |
РЛ | 0.85 | 0.88 | 0.85 | 0.84 |
ОДНАКО | 0.83 | 0.86 | 0.83 | 0.81 |
Для чаевого: Используйте многослойность, чтобы создать многомерный вид, который привлечет внимание и удержит внимание вашей аудитории..
Путем включения мазков, крупные планы, и слоистые текстуры, вы можете улучшить свои фотографии косметических товаров и сделать их неотразимыми для вашей аудитории..
Советы по редактированию для улучшения текстуры при постобработке
Техники ретуши для безупречных результатов
Монтаж — это то место, где ваша фотография косметической продукции по-настоящему оживает.. Ретушь помогает улучшить текстуры и создать безупречные изображения., профессиональные изображения. Начните с устранения всех отвлекающих факторов, как пыль или пятна, это может отвлечь внимание от вашего продукта. Такие инструменты, как восстанавливающая кисть или штамп-клон в Photoshop, могут творить здесь чудеса..
Следующий, сосредоточить внимание на улучшении естественной текстуры продукта. Например, если вы работаете с тонким слоем тонального крема, вы можете сгладить неровные края, сохраняя при этом кремовую консистенцию.. Будьте осторожны и не переусердствуйте: ваша цель — подчеркнуть детали., не придавать изделию искусственный вид.
Кончик: Используйте маски слоев для выборочного применения ретуши. Это дает вам больше контроля и сохраняет текстуру аутентичной..
Улучшение деталей с помощью регулировки контрастности и резкости
Контраст и резкость — ваши лучшие друзья, когда дело доходит до создания эффектных текстур.. Настройка контрастности помогает определить края вашего продукта., выделяя его текстуру. Например, Увеличение контраста на мазке мерцающих теней для век может сделать блеск более ярким..
Резкость, с другой стороны, выявляет более мелкие детали. Используйте такие инструменты, как «Маска нерезкости» или «Фильтр высоких частот», чтобы повысить резкость без внесения шума.. Здесь ключевым моментом является тонкое прикосновение — слишком большая резкость может сделать изображение резким..
Быстрый совет: Применяйте настройки резкости к определенным областям, как края мазка, привлечь внимание к наиболее важным частям вашего продукта.
Использование инструментов редактирования для улучшения четкости текстур.
Расширенные инструменты редактирования выведут ваши советы по бьюти-фотографии на новый уровень.. Такие методы, как Разложение художественного стиля позволяют настраивать текстуры, сохраняя при этом общий вид продукта.. Это особенно полезно для усиления маслянистости или регулировки толщины штрихов в мазках..
Редактирование текстур на основе примеров — еще один мощный метод.. Он адаптирует текстуры в соответствии со структурой продукта., обеспечение целостного внешнего вида. Для корректировок в реальном времени, Сети прогнозирования параметров (НДС) позволяют улучшать текстуры в интерактивном режиме, сделать ваш рабочий процесс быстрее и эффективнее.
Техника | Описание |
|---|---|
Разложение художественного стиля | Редактирует текстуру и геометрическую абстракцию, сохраняя при этом цвет и структуру структуры.. |
Редактирование текстур на основе примеров | Выравнивает текстуры с нижележащими структурами для единообразия., полированный вид. |
Сети прогнозирования параметров | Обеспечивает уточнение текстур в реальном времени для профессиональных рабочих процессов.. |
Эти инструменты помогут вам уточнить каждый мазок, вихрь, и мерцать, обеспечение наилучшего внешнего вида вашего продукта.
Освоив эти методы редактирования, вы можете превратить фотографию вашего продукта в визуальный шедевр. Ретушируете ли вы мазки, регулировка контрастности, или используя передовые инструменты, каждый шаг подчеркивает красоту текстуры вашего продукта.
Использование профессиональной поддержки для фотографий косметических продуктов
Как Oully поддерживает косметические бренды с помощью высококачественных фотографий
Когда дело доходит до создания высококачественных бьюти-фотографий, Улли прикроет твою спину. Их опыт в производстве косметической продукции распространяется на то, что они помогают брендам демонстрировать свою продукцию в лучшем свете — буквально. С более чем десятилетия опыта, Oully понимает, насколько важны визуальные эффекты для вашего списка косметических товаров.. Они предлагают профессиональные услуги по фотографии косметических товаров, подчеркивающие текстуры., цвета, и детали с точностью.
Одним из выдающихся преимуществ работы с Oully является их способность предоставлять безупречные результаты., профессиональные изображения. Их команда гарантирует, что каждая фотография будет отретушировано до совершенства, исправление дефектов и улучшение цвета.. Такое внимание к деталям делает вашу продукцию неотразимой для клиентов.. Правильные методы затенения также используются для добавления глубины и объема., придание вашим изображениям профессиональной отделки, привлекающей внимание. Эти небольшие штрихи могут значительно повысить вовлеченность клиентов и даже увеличить конверсию..
Интересный факт: Исследования показывают, что высококачественные изображения могут увеличить онлайн-продажи до 30%. В этом сила профессиональной фотографии!
Преимущества индивидуальной упаковки и брендинга в визуальном изображении продукта
Упаковка вашего продукта — это не просто контейнер, это часть истории, которую вы рассказываете.. Индивидуальная упаковка в сочетании с высококачественными косметическими фотографиями может улучшить имидж вашего бренда и выделить вашу продукцию.. Oully специализируется на создании упаковки, которая соответствует идентичности вашего бренда., собираетесь ли вы на роскошную, экологически чистый, или минималистская атмосфера.
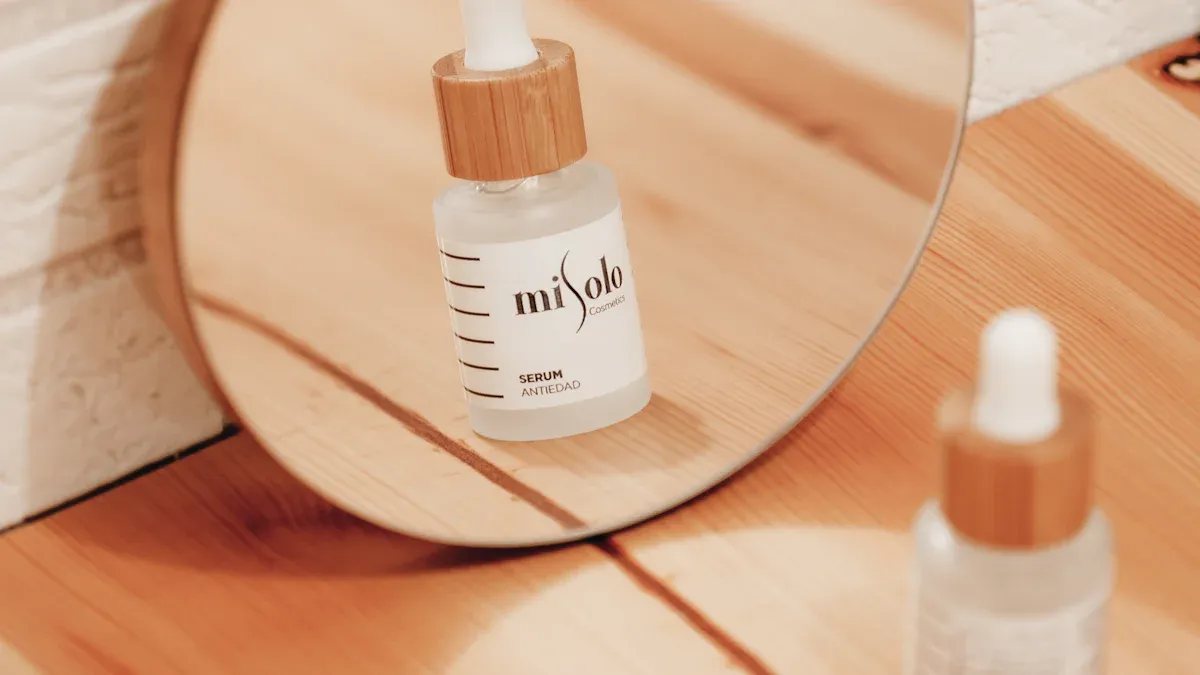
Когда ваша упаковка и визуальные эффекты работают вместе, они создают целостный вид, который трудно игнорировать. Представьте себе фотографию косметического продукта, изображающую флакон с сывороткой на мраморной столешнице., изящная упаковка привлекает внимание. Подобные изображения не только улучшат ваш список косметических товаров, но и оставят неизгладимое впечатление на вашу аудиторию..
Кончик: Используйте элементы образа жизни, которые дополнят дизайн вашей упаковки, чтобы создать цельную и визуально привлекательную композицию..
Согласование фотографии с идентичностью бренда и маркетинговыми целями
Ваш бренд уникален, и ваша фотография должна отражать это. Oully поможет вам согласовать визуальные эффекты с индивидуальностью вашего бренда и маркетинговыми целями.. Ориентируетесь ли вы на экологически сознательных потребителей или на покупателей предметов роскоши, они адаптируют свой подход к фотографии в соответствии с вашим видением.
Например, если ваш бренд ориентирован на натуральные ингредиенты, Oully может создавать фотографии образа жизни в естественных тонах и с органическим реквизитом.. С другой стороны, если вы стремитесь к элитному рынку, они будут использовать гладкий, современные фоны, подчеркивающие изысканность. Такое согласование гарантирует, что ваши фотографии находят отклик у вашей целевой аудитории и усиливают послание вашего бренда..
Используя профессиональные услуги по фотографированию косметических продуктов, вы можете создавать визуальные эффекты, которые не только выглядят потрясающе, но и рассказывают историю вашего бренда.. Опыт Oully в комбинировании индивидуальной упаковки, фотография образа жизни, и высококачественные изображения делают их надежным партнером для косметических брендов по всему миру..
Демонстрация текстур продукта — это искусство, сочетающее в себе освещение, композиция, и творчество. Такие методы, как экспериментируем со светом для увеличения глубины, освоение композиции для управления фокусом, и использование динамических презентаций Оживление текстур может преобразить фотографию вашего косметического бренда. Например, макроснимки раскрывают сложные детали, в то время как последовательные повествования создают эмоциональные связи с вашей аудиторией.
Освещение играет ключевую роль в формировании настроения и выделении текстур.. Речь идет не просто об освещении, а о создании визуальной истории, которая очаровывает вашу аудиторию..
Не стесняйтесь экспериментировать с разными углами обзора., оборудование, и креативные подходы. Гибкость и дальновидность помогут вам предвидеть, как освещение и движение повлияют на ваше окончательное изображение.. Системный подход гарантирует, что каждая деталь оптимизирована для достижения потрясающих результатов..
Фотография косметических товаров — это не только визуальные эффекты, но и укрепление доверия и демонстрация индивидуальности вашего бренда.. Когда вы выделяете текстуры достоверно, вы создаете сенсорный опыт, который находит отклик у вашей аудитории и повышает привлекательность вашего бренда..
Часто задаваемые вопросы
Как выделить текстуру продукта на фотографиях??
Используйте боковое или рассеянное освещение, чтобы подчеркнуть глубину и мягкость.. Сочетайте текстуры с дополнительным реквизитом и экспериментируйте со снимками крупным планом.. Выделение мазков, разливы, или образцы для создания динамичных визуальных эффектов, привлекающих внимание..
Какие настройки камеры лучше всего подходят для текстурной фотографии?
Установите диафрагму между f/8 и f/11 для получения резких деталей.. Используйте низкое ISO (100–200) чтобы уменьшить шум. Короткая выдержка обеспечивает четкость изображений. Ручной режим дает вам полный контроль над этими настройками..
Нужно ли профессиональное оборудование для текстурно-ориентированной фотографии??
Не обязательно! Зеркальная или беззеркальная камера., штатив, и основных осветительных приборов, таких как отражатели или рассеиватели, достаточно.. Предметы повседневного использования, такие как белые простыни или алюминиевая фольга, могут служить альтернативой DIY..
Как редактирование может улучшить текстуры продуктов?
Отрегулируйте контрастность и резкость, чтобы сделать текстуры яркими. Используйте такие инструменты, как маски слоев, для выборочной ретуши.. Передовые методы, такие как разложение художественного стиля, улучшают текстуры, сохраняя их аутентичность..
Почему текстура важна в фотографии косметических товаров?
Текстура рассказывает историю о качестве и ощущениях вашего продукта.. Это укрепляет доверие, демонстрируя подлинность, и помогает клиентам визуализировать, как работает продукт.. Выделение текстур делает ваш бренд более узнаваемым и запоминающимся..