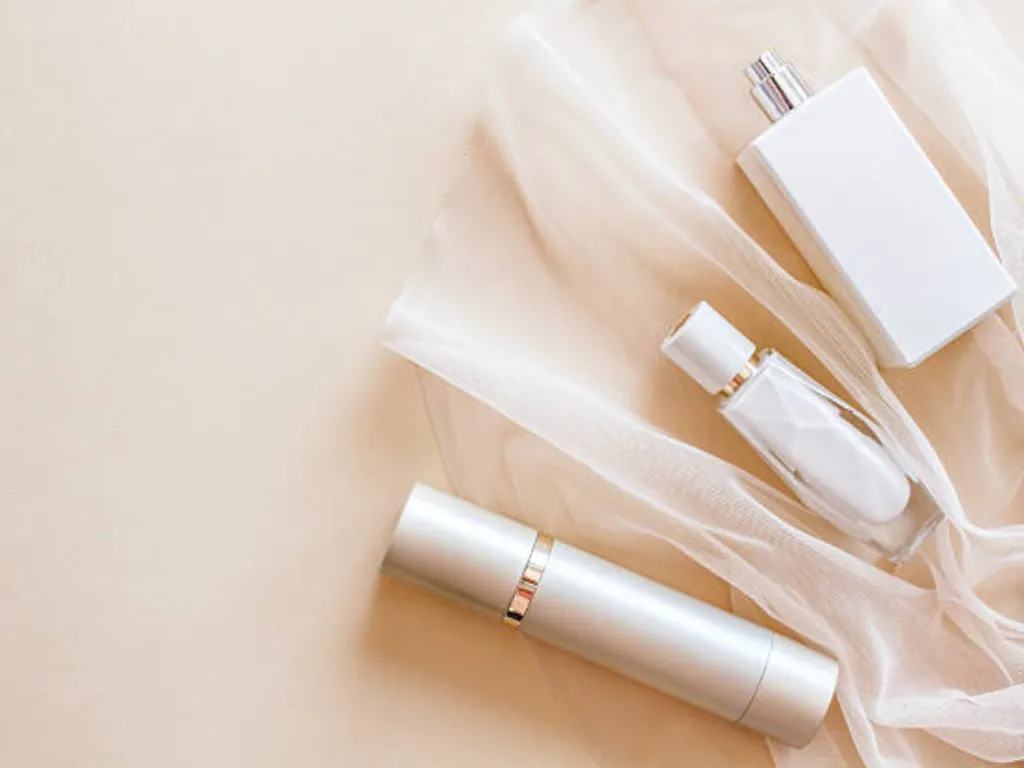
Have you ever noticed how a product’s texture can instantly catch your eye? Whether it’s the silky smoothness of a moisturizer or the shimmer of an eyeshadow, texture plays a huge role in how you perceive beauty products. It’s not just about looks—it’s about creating a sensory connection. When you highlight textures in beauty brand photography, you’re showing customers exactly what to expect. This builds trust and makes your product feel real, almost tangible, even through a screen. After all, a great photo doesn’t just show—it tells a story.
Did you know? Studies show that texture features like intensity variation and luminance are key predictors of beauty judgments. They explain nearly 59% of the appeal, proving just how important texture is in creating stunning visuals.
The Importance of Beauty Product Photography
Why texture is key to product storytelling
When it comes to beauty product photography, texture isn’t just a detail—it’s the story. Think about the creamy swirl of a face mask or the glossy sheen of a lipstick. These textures tell customers what your product feels like, how it works, and why they need it. For example, luxury brands often use embossed textures on packaging to convey sophistication and quality. This tactile design not only enhances the visual appeal but also creates a memorable branding experience. By showcasing textures, you’re giving your audience a sensory preview, making your product more relatable and desirable.
Tip: Use close-up shots to highlight intricate details like shimmer, smoothness, or grain. These images can make your product feel almost tangible, even online.
Building trust through authentic texture representation
Authenticity is everything in beauty product photography. Customers want to see the real deal, not an overly edited version of your product. Honest brands often use before-and-after photos to show the genuine effects of their cosmetics. This approach builds trust and reassures buyers that your claims are credible. Did you know that 93% of women pay close attention to efficacy claims before making a purchase? Showing the true texture of your product—whether it’s a lightweight serum or a rich body butter—can make all the difference.
Action shots are another great way to build trust. For instance, capturing a smear of foundation or a dollop of cream in action shows how the product applies and feels. These visuals not only educate but also inspire confidence in your brand.
Enhancing brand identity with consistent photography
Consistency in beauty brand photography is one of the key elements of beauty product photography. It’s what ties your visuals together and makes your brand instantly recognizable. High-quality, consistent images can elevate your brand’s image and even boost engagement rates on social media. Eye-tracking studies reveal that appealing imagery captures consumer attention, while conversion rate tests show that lifestyle shots often drive more sales than plain product images.
To maintain consistency, stick to a cohesive color palette and lighting style. For example, if your brand focuses on natural ingredients, soft, diffused lighting and earthy colors can reinforce that message. Consistent photography not only enhances your brand identity but also ensures that your products stand out in a crowded market.
Preparation for Texture-Focused Photography
Cleaning and prepping products for a flawless look
Before you even think about snapping a photo, make sure your products are camera-ready. A clean, polished product not only looks professional but also ensures that textures stand out beautifully in your shots. Start by gathering your essentials: a microfiber cloth, gentle cleaner, and white gloves to avoid smudges. For fabric props, tools like a lint roller, iron, or hand steamer can work wonders.
Here’s a quick checklist to get your products photo-ready:
Wipe down surfaces to remove dust or fingerprints.
Use a lint roller for fabric-based props or backgrounds.
Steam or iron any fabric elements to keep them wrinkle-free.
Once your products are prepped, set up your equipment. A DSLR or mirrorless camera, tripod, and good lighting are must-haves for beauty product photography. This preparation ensures your textures shine without distractions.
Pro Tip: Always inspect your product under the lighting setup before shooting. This helps you catch any imperfections that might show up in the final image.
Selecting props that complement product textures
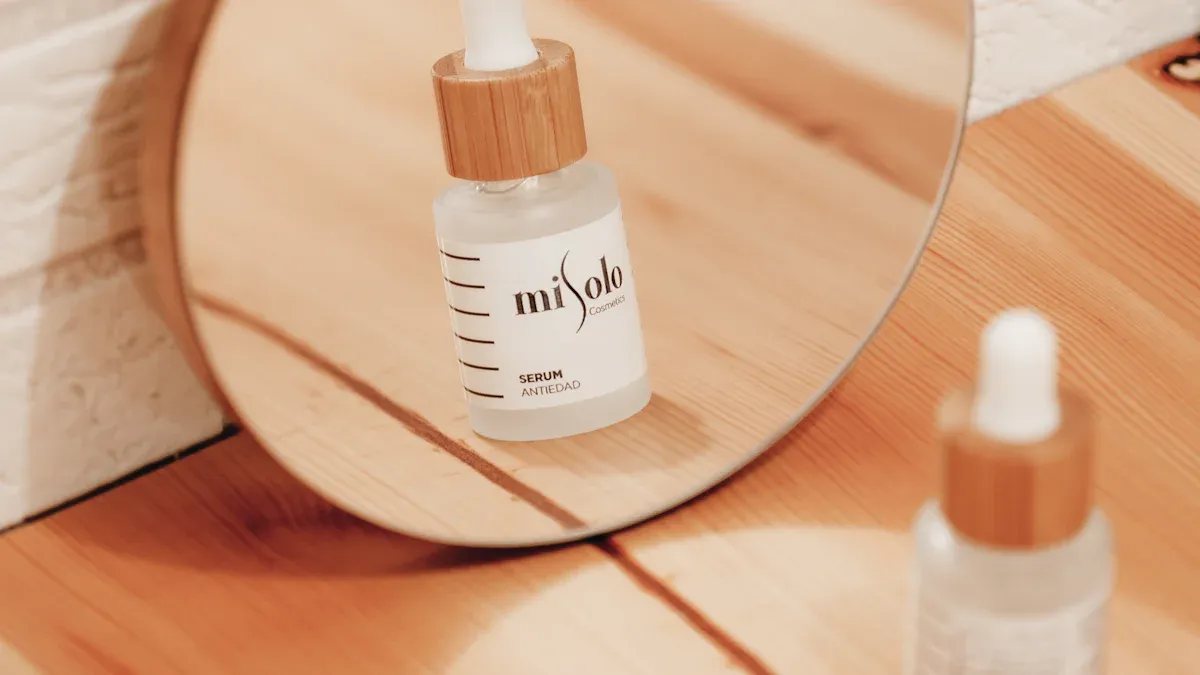
Props can make or break your composition. The right ones enhance your product’s texture and tell a cohesive story. For example, pairing a luxurious face cream with gold accents or marble surfaces can elevate its premium appeal. On the other hand, natural props like wooden trays or recycled paper can highlight eco-friendly skincare products.
Here’s how different props affect the way textures are perceived:
Prop Type | Effect on Product Textures |
|---|---|
Luxury props | Communicates the product’s premium positioning, enhancing appeal to high-end consumers. |
Natural and recycled props | Makes images feel authentic and relatable to environmentally conscious audiences. |
Minimalistic and geometric props | Highlights the product’s sleek design, making it the focal point of the photos. |
When staging your shot, keep the props simple. They should complement, not overpower, the product.
Creating a shot list to plan texture-focused compositions
A shot list is your roadmap to a successful shoot. It helps you stay organized and ensures you capture every detail of your product’s texture. Start by listing the key textures you want to highlight. For example, if you’re photographing a skincare product, you might focus on its creamy consistency, glossy finish, or smooth application.
Next, plan your angles and compositions. Close-up shots work well for intricate details, while flat lays can showcase multiple textures in one frame. Don’t forget to include action shots, like a smear of lotion or a swatch of lipstick, to add a dynamic element to your visuals.
Tip: Group similar shots together to save time during the shoot. For instance, capture all close-ups first, then move on to lifestyle compositions.
By prepping your products, selecting the right props, and planning your compositions, you’ll create stunning visuals that truly highlight your product’s textures.
Lighting Techniques for Beauty Brand Photography
Side lighting to emphasize depth and dimension
Side lighting is a game-changer when it comes to beauty product photography. By angling the light at 45 degrees, you can create shadows that bring out the texture and depth of your product. This technique works wonders for items like embossed packaging or textured creams. The shadows and highlights it creates give your photos a three-dimensional feel, making the product look more lifelike.
For the best results, use a hard light source, like a spotlight or a bare bulb, to emphasize intricate details. If you want a softer look, add a reflector or fill light to balance the shadows. This keeps the texture prominent without making the image too harsh. For example, side lighting can make the shimmer in an eyeshadow pop or highlight the smoothness of a serum bottle.
Pro Tip: Experiment with a 4:1 ratio of highlights to shadows. This balance enhances depth while keeping the overall image visually appealing.
Diffused lighting for soft, natural texture highlights
If you’re aiming for a softer, more natural look, diffused lighting is your best friend. This technique spreads light evenly across the product, reducing harsh shadows and creating a gentle glow. It’s perfect for showcasing smooth or glossy textures, like a hydrating face mask or a shiny lipstick tube.
To achieve this, use tools like softboxes, diffusers, or even a sheer curtain over a window. These modifiers scatter the light, making it less intense and more flattering. For instance, placing a softbox above and slightly behind the product can highlight its texture without overwhelming the image. Diffused lighting also works well for group shots, ensuring every item is evenly lit and textures are clearly visible.
Did you know? Diffused lighting is particularly effective for complex surfaces. It normalizes reflections from multiple angles, making textures stand out without looking overly sharp.
Using shadows strategically to add contrast
Shadows aren’t just a byproduct of lighting—they’re a tool you can use to add drama and contrast to your photos. By playing with shadows, you can make textures more pronounced and give your images a sense of depth. For example, a shadow cast by a jar of cream can emphasize its round shape and smooth surface.
To control shadows, adjust the angle and intensity of your light source. A low-angle light can create long, dramatic shadows, while a higher angle produces softer, subtler ones. Reflectors can help you soften shadows if they’re too harsh, while black cards can deepen them for a more striking effect.
Quick Tip: Use shadows to guide the viewer’s eye to the most important parts of your product. This technique not only highlights textures but also adds a touch of artistry to your beauty brand photography.
By mastering these lighting setups, you can bring out the best in your product’s textures. Whether you’re using side lighting for depth, diffused lighting for softness, or shadows for contrast, each technique adds a unique element to your photos. The right lighting can transform your beauty product photography, making your products look irresistible.
Camera Settings and Equipment for Texture Photography
Best camera settings for capturing intricate details
Getting the right camera settings is the first step to showcasing your product’s textures. You want every shimmer, smear, and swirl to stand out. To do this, focus on three key settings: aperture, shutter speed, and ISO.
Aperture: This controls how much light enters your camera and affects the depth of field. For sharp, detailed shots, stick to an aperture range of f/8 to f/11. These settings keep your product in focus while maintaining clarity across the frame. If you’re photographing a single item, a wider aperture like f/2.8 can blur the background and make the product pop.
Shutter Speed: A fast shutter speed, like 1/125s or higher, freezes motion and ensures crisp details. If you’re working with slower speeds, use a tripod to avoid blur.
ISO: Keep your ISO low—around 100 or 200—to minimize noise and maintain image quality.
Pro Tip: Use manual mode to have full control over these settings. This lets you fine-tune your camera for the best results in beauty product photography.
Choosing lenses for macro and close-up shots
The lens you choose can make or break your ability to highlight the details of your product. Macro lenses are your go-to for capturing intricate textures. These lenses are designed for close-up photography and offer 1:1 life-size magnification, making them perfect for beauty brand photography.
Here’s what to look for in a lens:
Macro Lenses: A focal length between 90mm and 105mm gives you a comfortable working distance while capturing detailed textures.
Prime Lenses: These lenses deliver sharpness and clarity, ideal for texture-focused shots.
Zoom Lenses: If you need versatility, zoom lenses let you adjust focal length without changing lenses.
Did you know? Macro lenses are especially effective for products with intricate designs, like embossed packaging or shimmering eyeshadows.
Essential tools like reflectors and diffusers
Lighting tools like reflectors and diffusers are game-changers for enhancing product textures. Reflectors bounce light onto your product, filling in shadows and adding brightness. Diffusers soften harsh light, creating an even glow that highlights textures without overwhelming the image.
Tool | Function |
|---|---|
Reflectors | Manipulate light, fill shadows, and brighten textures. |
Bounce Cards | Target specific areas for highlighting. |
Diffusers | Soften light and distribute it evenly across the product. |
You don’t need fancy equipment to get started. Everyday items like sheer curtains, white bed sheets, or tracing paper can work as diffusers. For reflectors, try aluminum foil or a white poster board.
Quick Tip: Position your diffuser between the light source and the product to minimize harsh shadows and create a soft, natural look.
By mastering your camera settings, choosing the right lenses, and using essential tools, you’ll elevate your beauty product photography. These techniques ensure your product’s textures shine, making them irresistible to your audience.
Creative Approaches to Highlight Product Textures
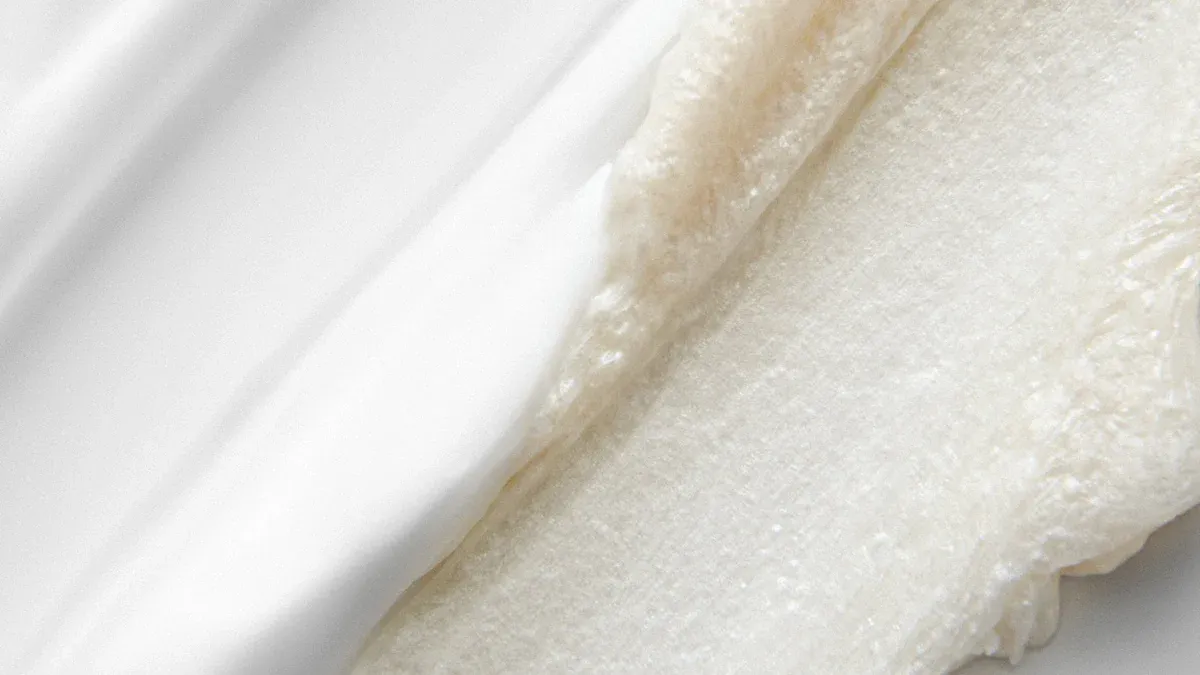
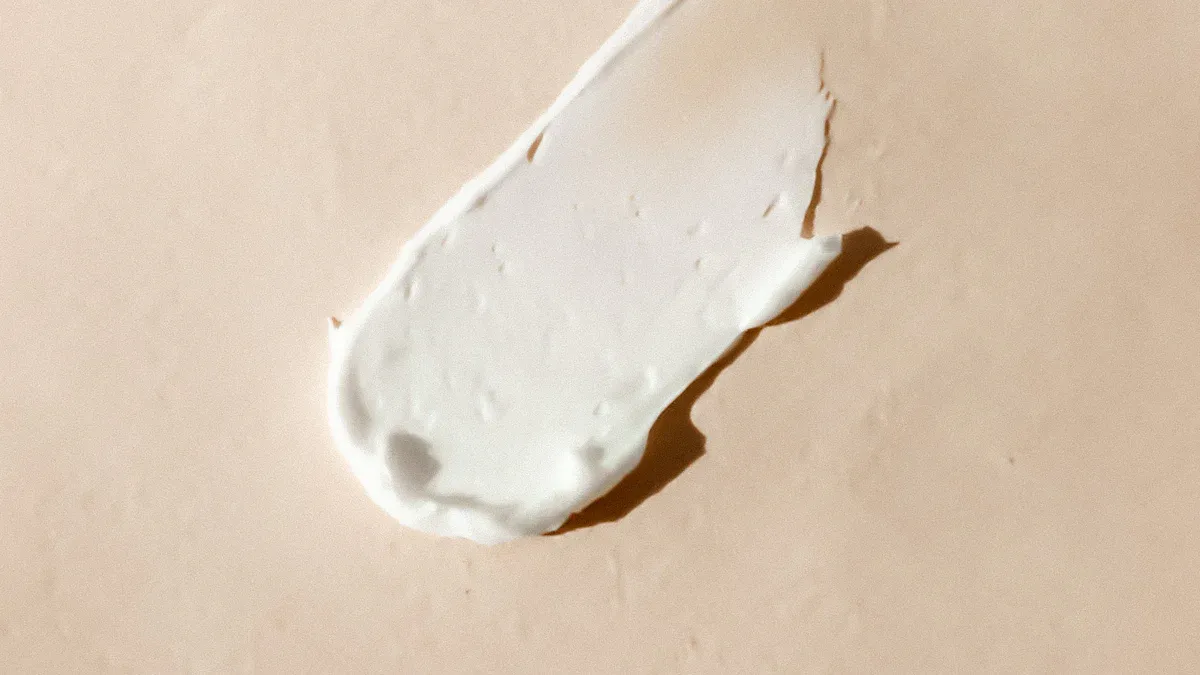
Smears, spills, and swatches for dynamic visuals
Smears, spills, and swatches are some of the most effective ways to showcase the texture of beauty products. A smear of the product, like a creamy moisturizer or a glossy lipstick, instantly communicates its consistency and quality. These visuals not only highlight the product’s texture but also add a dynamic, artistic element to your photography.
For example, a smear of foundation on a clean surface can show its smooth application, while a spill of shimmering eyeshadow powder can emphasize its vibrant pigmentation. Custom beauty smears can also help you create unique compositions that align with your brand’s identity. Pair these smears with complementary props or backgrounds to enhance their visual appeal.
Tip: Use a palette knife or a small spatula to create clean, intentional smears. This ensures the texture looks polished and professional.
Close-up shots to showcase intricate details
Close-up shots are essential for beauty product photography, especially when you want to highlight intricate textures. This technique allows you to zoom in on the product’s details, making them appear larger than life. Whether it’s the fine shimmer in an eyeshadow or the velvety texture of a face cream, close-ups create a tactile visual experience for your audience.
When you emphasize texture and material in your photos, you help customers feel more confident in their purchase decisions. They can almost “feel” the product through the screen, which significantly enhances its perceived quality. Macro photography works wonders here, capturing every detail with precision.
Did you know? Highlighting texture in product photography can increase consumer engagement by making the product feel more tangible and real.
Layering textures for a rich, multidimensional look
Layering textures is a creative way to add depth and dimension to your beauty brand photography. By combining different textures—like a glossy serum with a matte background or a product plus smear on a textured surface—you can create visually striking compositions. This approach not only draws attention to the product but also tells a story about its features and benefits.
For instance, pairing a creamy lotion with a soft fabric prop can evoke a sense of luxury and comfort. On the other hand, placing a product on a rough, natural surface like wood or stone can highlight its organic ingredients. Experiment with various combinations to find the perfect balance that complements your product’s texture.
Here’s a quick comparison of creative methodologies for displaying textures:
Model | SSIM | Contrast Fidelity | Texture Fidelity | Digital Color Fidelity |
|---|---|---|---|---|
VAE + RL | 0.92 | 0.95 | 0.94 | 0.93 |
GPT | 0.89 | 0.91 | N/A | N/A |
Llama-3 | 0.88 | 0.90 | N/A | N/A |
VAE | 0.87 | 0.90 | 0.88 | 0.85 |
RL | 0.85 | 0.88 | 0.85 | 0.84 |
GAN | 0.83 | 0.86 | 0.83 | 0.81 |
Pro Tip: Use layering to create a multidimensional look that grabs attention and keeps your audience engaged.

By incorporating smears, close-ups, and layered textures, you can elevate your beauty product photography and make your products irresistible to your audience.
Editing Tips to Enhance Texture in Post-Production
Retouching techniques for polished results
Editing is where your beauty product photography truly comes to life. Retouching helps you refine textures and create polished, professional images. Start by removing any distractions, like dust or smudges, that might take attention away from your product. Tools like the healing brush or clone stamp in Photoshop can work wonders here.
Next, focus on enhancing the product’s natural texture. For example, if you’re working with a smear of foundation, you can smooth out uneven edges while keeping its creamy consistency intact. Be careful not to overdo it—your goal is to highlight the details, not make the product look artificial.
Tip: Use layer masks to apply retouching selectively. This gives you more control and keeps the texture looking authentic.
Enhancing details with contrast and sharpness adjustments
Contrast and sharpness are your best friends when it comes to making textures pop. Adjusting contrast helps define the edges of your product, making its texture stand out. For instance, increasing contrast on a smear of shimmering eyeshadow can make the sparkle more vibrant.
Sharpness, on the other hand, brings out the finer details. Use tools like the Unsharp Mask or High Pass Filter to enhance sharpness without introducing noise. A subtle touch is key here—too much sharpness can make the image look harsh.
Quick Tip: Apply sharpness adjustments to specific areas, like the edges of a smear, to draw attention to the most important parts of your product.
Using editing tools to refine texture clarity
Advanced editing tools can take your beauty photography tips to the next level. Techniques like Artistic Style Decomposition allow you to tweak textures while preserving the product’s overall look. This is especially useful for enhancing oiliness or adjusting stroke thickness in smears.
Example-Based Texture Editing is another powerful method. It adapts textures to fit the product’s structure, ensuring a cohesive appearance. For real-time adjustments, Parameter Prediction Networks (PPNs) let you refine textures interactively, making your workflow faster and more efficient.
Technique | Description |
|---|---|
Artistic Style Decomposition | Edits texture and geometric abstraction while maintaining color and structure composition. |
Example-Based Texture Editing | Aligns textures with underlying structures for a consistent, polished look. |
Parameter Prediction Networks | Enables real-time texture refinement for professional workflows. |
These tools help you refine every smear, swirl, and shimmer, ensuring your product looks its absolute best.
By mastering these editing techniques, you can transform your product photography into a visual masterpiece. Whether you’re retouching smears, adjusting contrast, or using advanced tools, each step brings out the beauty of your product’s texture.
Leveraging Professional Support for Beauty Product Photography
How Oully supports beauty brands with high-quality photography
When it comes to creating high-quality beauty photography, Oully has your back. Their expertise in beauty product manufacturing extends to helping brands showcase their products in the best light—literally. With over a decade of experience, Oully understands how crucial visuals are for your beauty product listing. They offer professional beauty product photography services that highlight textures, colors, and details with precision.
One of the standout benefits of working with Oully is their ability to deliver polished, professional images. Their team ensures every photo is retouched to perfection, correcting imperfections and enhancing colors. This attention to detail makes your products look irresistible to customers. Proper shadowing techniques are also used to add depth and dimension, giving your images a professional finish that grabs attention. These small touches can significantly boost customer engagement and even drive conversions.
Fun Fact: Studies show that high-quality images can increase online sales by up to 30%. That’s the power of professional photography!
Benefits of custom packaging and branding in product visuals
Your product’s packaging isn’t just a container—it’s part of the story you’re telling. Custom packaging paired with high-quality beauty photography can elevate your brand’s image and make your products stand out. Oully specializes in creating packaging that aligns with your brand identity, whether you’re going for a luxurious, eco-friendly, or minimalist vibe.
When your packaging and visuals work together, they create a cohesive look that’s hard to ignore. Imagine a lifestyle beauty product photo featuring your serum bottle on a marble countertop, with its sleek packaging stealing the show. This kind of imagery not only enhances your beauty product listing but also leaves a lasting impression on your audience.
Tip: Use lifestyle props that complement your packaging design to create a seamless and visually appealing composition.
Aligning photography with brand identity and marketing goals
Your brand is unique, and your photography should reflect that. Oully helps you align your visuals with your brand identity and marketing goals. Whether you’re targeting eco-conscious consumers or luxury shoppers, they tailor their photography approach to match your vision.
For example, if your brand focuses on natural ingredients, Oully can create lifestyle photos that feature earthy tones and organic props. On the other hand, if you’re aiming for a high-end market, they’ll use sleek, modern backdrops to emphasize sophistication. This alignment ensures your photos resonate with your target audience and reinforce your brand message.
By leveraging professional beauty product photography services, you can create visuals that not only look stunning but also tell your brand’s story. Oully’s expertise in combining custom packaging, lifestyle photography, and high-quality images makes them a trusted partner for beauty brands worldwide.
Showcasing product textures is an art that combines lighting, composition, and creativity. Techniques like experimenting with light to enhance depth, mastering composition to guide focus, and using dynamic presentations to bring textures to life can transform your beauty brand photography. For example, macro shots reveal intricate details, while sequential narratives build emotional connections with your audience.
Lighting plays a pivotal role in shaping the mood and highlighting textures. It’s not just about illumination—it’s about creating a visual story that captivates your audience.
Don’t hesitate to experiment with different angles, equipment, and creative approaches. Flexibility and foresight help you anticipate how lighting and movement will impact your final image. A systematic approach ensures every detail is optimized for stunning results.
Beauty product photography isn’t just about visuals—it’s about building trust and showcasing your brand’s identity. When you highlight textures authentically, you create a sensory experience that resonates with your audience and elevates your brand appeal.
FAQ
How can I make product textures stand out in photos?
Use side lighting or diffused lighting to emphasize depth and softness. Pair textures with complementary props and experiment with close-up shots. Highlight smears, spills, or swatches to create dynamic visuals that grab attention.
What camera settings work best for texture photography?
Set your aperture between f/8 and f/11 for sharp details. Use a low ISO (100–200) to reduce noise. A fast shutter speed ensures crisp images. Manual mode gives you full control over these settings.
Do I need professional equipment for texture-focused photography?
Not necessarily! A DSLR or mirrorless camera, a tripod, and basic lighting tools like reflectors or diffusers are enough. Everyday items like white sheets or aluminum foil can work as DIY alternatives.
How can editing enhance product textures?
Adjust contrast and sharpness to make textures pop. Use tools like layer masks for selective retouching. Advanced techniques like Artistic Style Decomposition refine textures while keeping them authentic.
Why is texture important in beauty product photography?
Texture tells a story about your product’s quality and feel. It builds trust by showing authenticity and helps customers visualize how the product works. Highlighting textures makes your brand more relatable and memorable.